Ridgid Table Saw Owners Manual⁚ A Comprehensive Guide
This manual provides a comprehensive guide for understanding and using your Ridgid table saw. It covers essential safety precautions‚ features‚ assembly instructions‚ operation‚ maintenance‚ troubleshooting tips‚ and customer service information. Follow these instructions carefully to ensure safe and efficient use of your table saw and maximize its lifespan;
Introduction
Welcome to the world of precision woodworking with your new Ridgid table saw. This manual is your guide to unlocking the full potential of your powerful tool. Designed for both DIY enthusiasts and professional woodworkers‚ the Ridgid table saw combines dependability‚ ease of operation‚ and operator safety.
This comprehensive manual provides a step-by-step journey through every aspect of your table saw‚ from unpacking and assembly to mastering its features and performing maintenance. By carefully studying and adhering to the instructions outlined in this manual‚ you can ensure a safe and enjoyable woodworking experience.
Whether you’re tackling intricate projects or simple cuts‚ the Ridgid table saw is built to deliver years of rugged‚ trouble-free performance. This manual is your key to unlocking the possibilities of precision woodworking. Let’s get started!
General Safety Rules
Safety is paramount when using any power tool‚ especially a table saw. Always prioritize your well-being and follow these general safety rules to minimize the risk of injury⁚
- Read and Understand the Manual⁚ Before operating your table saw‚ carefully read and understand all instructions‚ warnings‚ and safety precautions outlined in this manual.
- Keep Work Area Clean⁚ A cluttered work area increases the risk of accidents. Keep your work area clean and free of debris‚ ensuring you have ample space to move around safely.
- Avoid Distractions⁚ Do not operate the table saw while under the influence of alcohol or drugs‚ or when feeling tired or fatigued. Stay focused and alert at all times to avoid distractions.
- Use Safety Equipment⁚ Always wear safety glasses or goggles to protect your eyes from flying debris. Consider using hearing protection to minimize noise exposure during operation.
- Proper Clothing⁚ Avoid loose clothing‚ jewelry‚ or long hair that could become entangled in the saw blade. Wear close-fitting clothing that won’t hinder your movement.
- Secure Workpiece⁚ Use clamps or a vise to hold the workpiece securely in place. This frees both hands to operate the tool safely and prevents the workpiece from moving unexpectedly.
- Avoid Overreaching⁚ Maintain a balanced stance and keep proper footing at all times. Never reach for the workpiece or tools in a way that could cause you to lose your balance.
- Disconnect Power⁚ Always disconnect the table saw from the power source before performing any maintenance‚ adjustments‚ or blade changes.
- Blade Coasts⁚ Be aware that the saw blade continues to spin for a short time after the power is turned off. Do not attempt to remove or adjust the blade until it has come to a complete stop.
- Use Only Recommended Accessories⁚ Only use accessories specifically designed for your table saw and listed in this manual. Improper accessories can cause serious injury.
By adhering to these general safety rules‚ you can significantly reduce the risk of accidents and ensure a safe woodworking experience.
Specific Safety Rules
In addition to the general safety rules‚ there are specific precautions you must take when operating your Ridgid table saw. These rules are designed to protect you from potential hazards unique to this tool⁚
- Blade Guard⁚ Always keep the blade guard in place and properly adjusted‚ ensuring it covers the blade during operation. The blade guard is designed to prevent contact with the rotating blade and reduce the risk of kickback.
- Anti-Kickback Pawls⁚ These devices are designed to prevent the workpiece from being kicked back toward you during operation. Ensure that the anti-kickback pawls are properly installed and functioning correctly.
- Rip Fence⁚ Use the rip fence to guide the workpiece accurately and safely. Ensure the rip fence is securely clamped to the table and properly aligned before starting any cuts.
- Miter Gauge⁚ Use the miter gauge when making crosscuts. Ensure the miter gauge is securely clamped to the table and aligned with the miter slot before making any cuts.
- Push Sticks⁚ Use push sticks to guide the workpiece through the saw blade‚ keeping your hands away from the blade. Always use push sticks when cutting small or thin pieces of wood.
- No Through Cuts⁚ Avoid making through cuts on thin or narrow pieces of wood without using a support board or other suitable device to prevent the workpiece from catching on the saw blade.
- Avoid Stalling⁚ Don’t force the saw blade through the workpiece‚ as this could cause it to stall and kickback. If the saw blade stalls‚ immediately stop the saw and disconnect it from the power source before attempting to free the workpiece.
- Use Proper Blade for Material⁚ Select the correct saw blade for the type of material you are cutting. Use a blade designed for hardwoods for hardwoods and a blade designed for softwoods for softwoods. Use a blade designed for plywood for plywood. Use a blade designed for metal for metal. Use a blade designed for plastic for plastic. Use a blade designed for other materials for other materials.
By following these specific safety rules‚ you can significantly reduce the risk of injury and ensure a safer woodworking experience.
Electrical
Proper electrical connections and precautions are crucial for safe and reliable operation of your Ridgid table saw. This section outlines the electrical requirements and safety practices to follow⁚
- Power Source⁚ Ensure your table saw is connected to a dedicated 120V‚ 15-amp circuit with a properly grounded outlet. Avoid using extension cords whenever possible‚ as they can increase the risk of electrical hazards. If you must use an extension cord‚ use a heavy-duty‚ three-wire extension cord with a ground plug and a three-pole receptacle that accepts the tool’s plug. Ensure the extension cord is rated for the power draw of your saw.
- Grounding⁚ The table saw is equipped with a three-prong ground plug. Always use a properly grounded outlet. Never attempt to bypass the ground connection or use an adapter to fit the plug into a two-prong outlet. Grounding helps protect you from electrical shock in case of a short circuit or electrical fault.
- Cord Inspection⁚ Regularly inspect the power cord for damage‚ such as cracks‚ cuts‚ or fraying. If any damage is found‚ immediately discontinue use and replace the cord with a new one. Never use the saw if the cord is damaged or frayed.
- Moisture and Wet Conditions⁚ Do not operate the table saw in wet or damp conditions. Avoid using the saw near water‚ standing water‚ or any other moisture sources. Water can conduct electricity and increase the risk of electrical shock.
- Unplug When Not in Use⁚ Always unplug the table saw from the power source when not in use‚ when performing maintenance‚ or when making adjustments. This prevents accidental starts and potential electrical hazards.
- Disconnect From Power Source⁚ Before performing any maintenance‚ cleaning‚ or adjustments‚ always disconnect the table saw from the power source. Never work on the saw with it plugged in. This minimizes the risk of electrical shock while working on the tool.
Adhering to these electrical guidelines ensures a safe and reliable operating environment for your Ridgid table saw.
Features
Your Ridgid table saw is designed with a range of features to provide precision cutting‚ durability‚ and user convenience. Here are some key features to familiarize yourself with⁚
- Cast Iron Table and Trunion Assembly⁚ The table saw features a robust cast iron table and trunion assembly‚ ensuring stability and accuracy during cutting operations. The cast iron construction provides rigidity and resistance to vibration‚ minimizing movement and ensuring precise cuts.
- StaySquare Fence⁚ The StaySquare fence is designed for accurate and repeatable cuts. It provides a stable and secure guide for your workpiece‚ allowing for precise rip cuts. The fence features a locking mechanism to ensure its position remains fixed during operation.
- Separate Locking Blade Height and Bevel Control Wheels⁚ The table saw offers separate control wheels for adjusting blade height and bevel angles. These wheels are equipped with locking mechanisms to ensure precise and repeatable settings for various cutting tasks.
- Anti-Kickback Pawls⁚ The anti-kickback pawls are a safety feature designed to reduce the risk of kickback‚ a dangerous situation where the workpiece is ejected back towards the operator. The pawls help to prevent the workpiece from being thrown back by the blade‚ enhancing safety during cutting operations.
- Blade Guard Assembly⁚ The table saw includes a blade guard assembly that protects the user from contact with the rotating blade. The guard helps to prevent accidental contact with the blade‚ promoting safe operation. It can be raised or lowered to accommodate different cutting operations.
- Riving Knife⁚ The riving knife is another safety feature that helps to prevent kickback. It is a thin metal strip that runs behind the blade‚ splitting the kerf (the cut made by the blade) and preventing the workpiece from pinching the blade. The riving knife helps to control the workpiece and reduce the risk of kickback.
- Dust Collection Port⁚ The table saw features a dust collection port for connecting to a dust collection system. This port helps to remove sawdust and debris from the cutting area‚ improving air quality and maintaining a clean workspace.
These features contribute to the overall performance‚ safety‚ and user-friendliness of your Ridgid table saw.
Assembly
Assembling your Ridgid table saw is a straightforward process‚ but it’s essential to follow the instructions carefully to ensure safety and proper functionality. Before you begin‚ gather the necessary tools and ensure you have a clear and stable work surface. Refer to the parts list provided in the manual to identify all components.
Unpacking⁚ Carefully remove the table saw from its packaging‚ being cautious of its weight. Lay it flat on a stable work surface.
Assembling the Leg Stand⁚ Attach the inner leg assemblies to the center brace using carriage bolts‚ large spacers‚ and lock nuts. Ensure the bolts are securely tightened. Slide the center brace onto the bolts and secure it in place.
Attaching the Leg Stand to the Table Saw Base⁚ Align the holes in the table saw base with the holes in the leg stand. Insert bolts through the holes and secure them with lock washers‚ flat washers‚ ring terminals (from the switch box)‚ and hex nuts. Ensure the bolts are tightened securely‚ but not so tight that the leg stand cannot be adjusted.
Opening the Leg Stand⁚ Grasp the grips on the saw table and stand it upright. Step on the release lever and pull the grips toward you simultaneously to open the leg stand.
Securing and Leveling the Saw⁚ Once the leg stand is open‚ ensure the table saw rests on a flat‚ level surface. Adjust the leveling feet until the saw is balanced and doesn’t rock from side to side.
Closing the Leg Stand⁚ To close the leg stand‚ remove any workpieces‚ tools‚ or accessories. Lower the saw blade and follow the instructions in the manual to secure the leg stand in its closed position.
Removing‚ Replacing‚ and Aligning the Throat Plate⁚ Ensure the throat plate is level with the saw table. If necessary‚ adjust its position using the set screws provided.
Installing the Anti-Kickback Pawls and Blade Guard⁚ Install the anti-kickback pawls according to the manual’s instructions. Ensure the pawls are properly positioned and secured. Lift the guard lever to unlock the blade guard. Lower the back of the guard into the middle hole of the riving knife and push the front down until it’s parallel to the table.
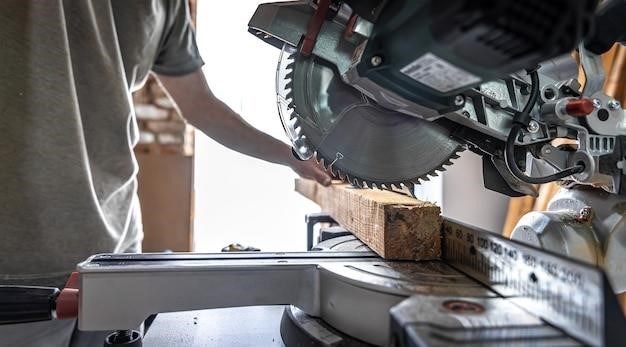
Installing the Blade⁚ Ensure the saw blade teeth point downwards toward the front of the saw. Install the blade using the blade wrench‚ ensuring it is securely tightened.
After completing the assembly process‚ carefully review the safety instructions in the manual before operating your Ridgid table saw.

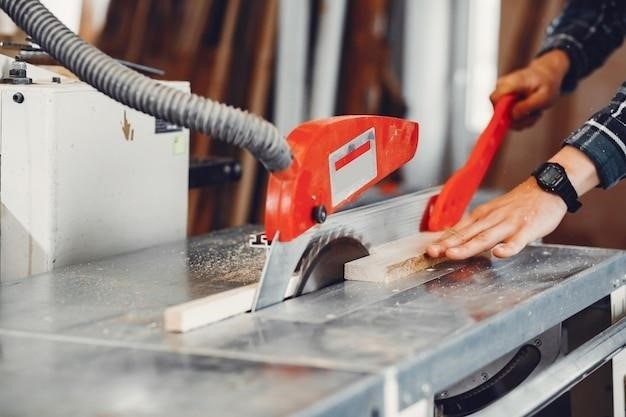
Operation
Operating your Ridgid table saw safely and effectively requires understanding its features and adhering to proper procedures. Before you begin‚ always review the safety instructions in the manual. Familiarize yourself with the controls and components of your saw.
Setting the Blade Height and Bevel⁚ Use the handwheel on the front of the cabinet to adjust the blade height. To adjust the bevel‚ rotate the bevel adjusting handwheel to the desired angle. Ensure the blade height and bevel lock knobs are securely tightened;
Adjusting the Rip Fence⁚ The rip fence helps ensure accurate and precise cuts. To adjust it‚ loosen the fence lock knob and slide the fence to the desired position. Tighten the knob to secure the fence.
Using the Miter Gauge⁚ The miter gauge allows for angled cuts. Align the miter gauge with the miter slot and secure it in place. Position the workpiece against the miter gauge and make the cut.
Making Cuts⁚ Always ensure the blade guard is in place and properly adjusted. Before starting the saw‚ ensure the workpiece is securely clamped or held in place and that your body is clear of the blade path. Turn the saw on and make the cut slowly and carefully. Avoid pushing the workpiece forcefully‚ as this can cause kickback. Always allow the blade to come to a complete stop before removing the workpiece.
Using the Blade Guard⁚ The blade guard helps prevent injuries by covering the blade during operation. Always ensure the guard is in place and properly adjusted. Never remove the guard while the saw is in operation.
Cleaning and Maintenance⁚ Regularly clean and maintain your table saw to ensure it operates smoothly and safely. Refer to the maintenance section in the manual for detailed instructions.
Remember‚ operating your table saw safely is paramount. Always follow the instructions in the manual and use common sense to avoid potential hazards.
Maintenance
Regular maintenance is crucial for keeping your Ridgid table saw in top condition‚ ensuring its longevity and safe operation. Follow these steps to maintain your saw effectively⁚
Cleaning⁚ After each use‚ clean your saw thoroughly. Remove sawdust and debris from the table‚ fence‚ miter gauge‚ blade guard‚ and other components. Use a brush‚ vacuum cleaner‚ or compressed air to remove dust from hard-to-reach areas. Keep the saw clean to prevent dust buildup‚ which can affect performance and safety.
Blade Care⁚ Regularly inspect the saw blade for damage‚ such as chips‚ cracks‚ or dullness. Sharpen or replace the blade as needed. Always use the correct blade for the material you are cutting. A dull or damaged blade can increase the risk of kickback and reduce the quality of cuts.
Lubrication⁚ Lubricate the saw’s moving parts‚ such as the blade arbor‚ miter gauge‚ and fence‚ with a light oil or grease. Refer to the manual for specific lubrication points. Proper lubrication reduces friction‚ improves performance‚ and extends the life of the saw.
Belt Tension⁚ Periodically check the belt tension on the motor. The belt should be tight enough to prevent slipping but not so tight that it puts excessive stress on the motor. Adjust the belt tension as needed.
Electrical Connections⁚ Inspect the electrical cord and plug for damage or wear. Replace them if necessary. Always ensure the saw is properly grounded to prevent electrical shock.
Storage⁚ Store your saw in a dry‚ clean‚ and well-ventilated area. Cover it with a protective cloth to prevent dust and debris accumulation. Avoid storing the saw in extreme temperatures or humid environments.
By following these maintenance procedures‚ you can ensure that your Ridgid table saw operates reliably and safely for many years to come.